Learning After Effects. Making Animations!
Prepare & Import Assets
There are two ways to prepare assets:
- import PNGs or JPGs;
-
import PSD or AI;
Be sure to carefully organize all the layers. Any content that needs to animate should be a separate layer.
Let's start with PSD!
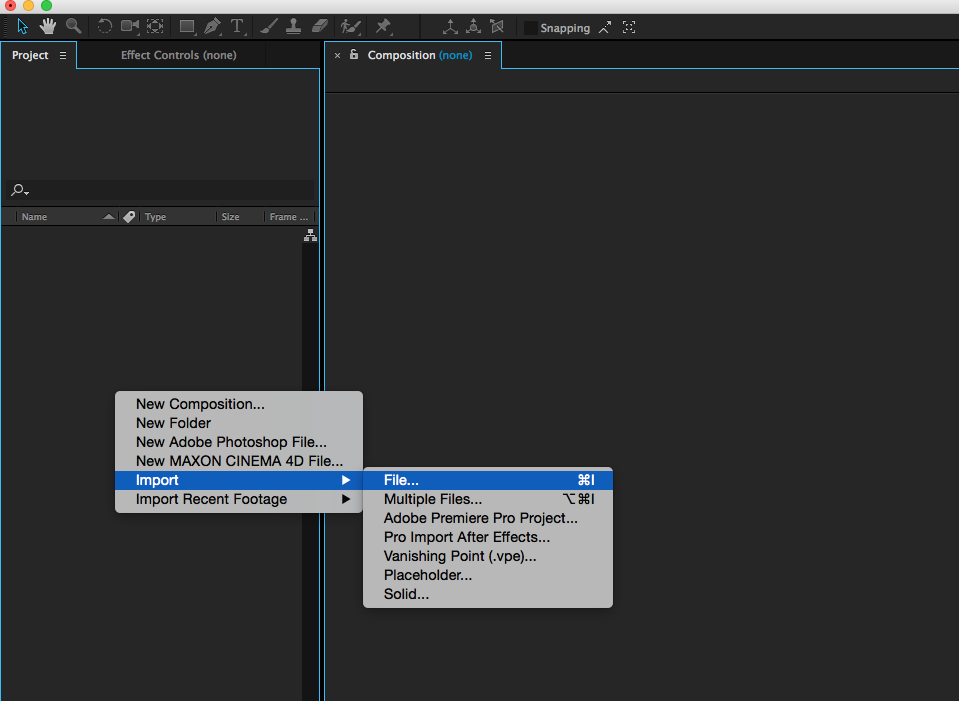
Launch After Effects > Right Click in Project Panel > Import > File…
OR Double click in Project Panel.
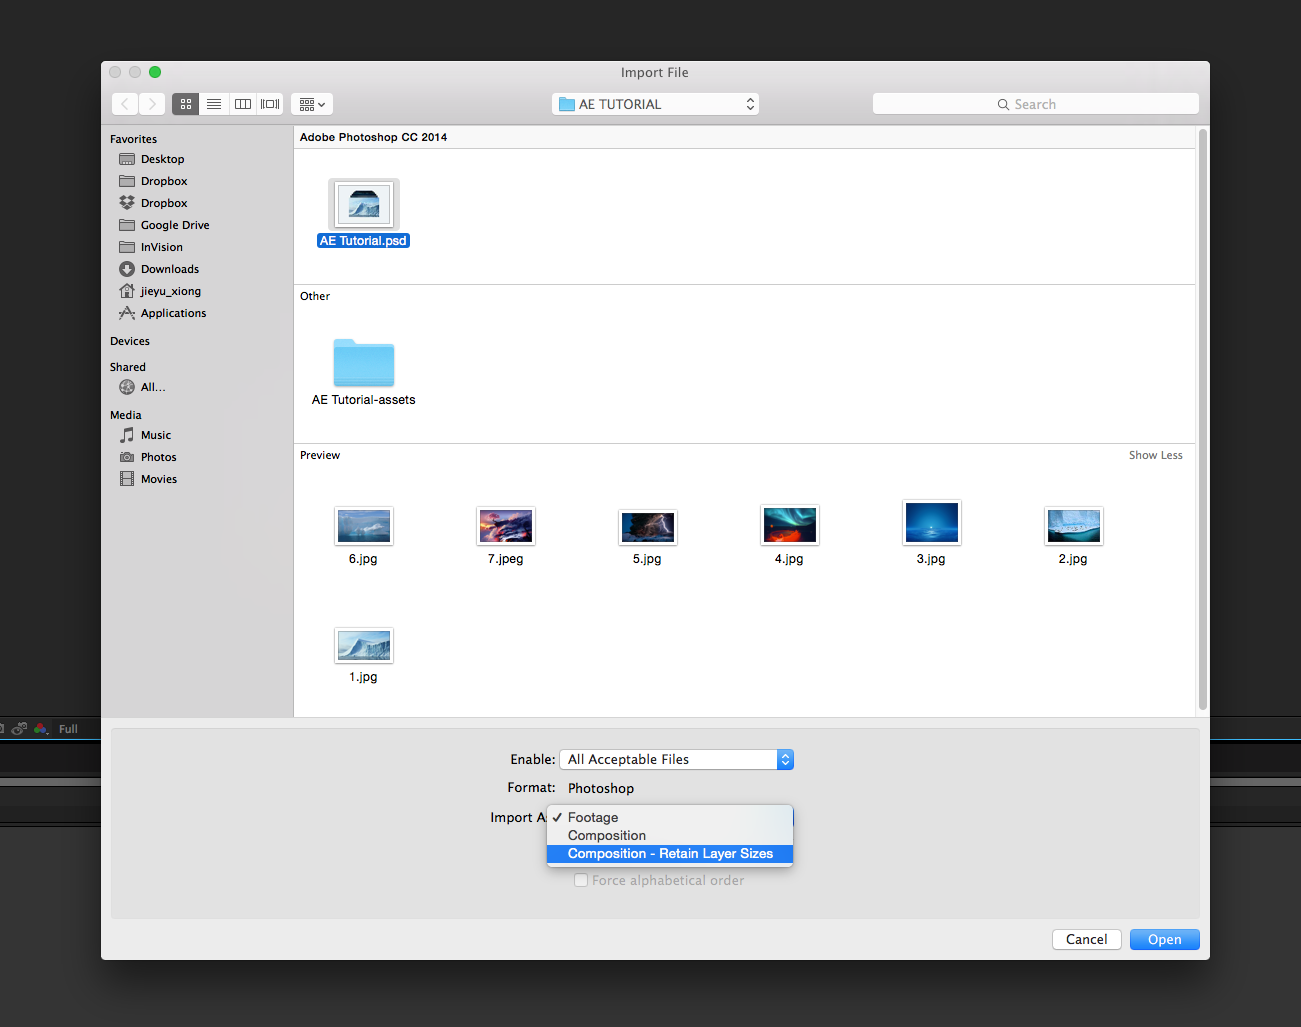
In the Import File window, choose psd file, make sure Composition - Retain Layer Sizes is selected, then hit open.
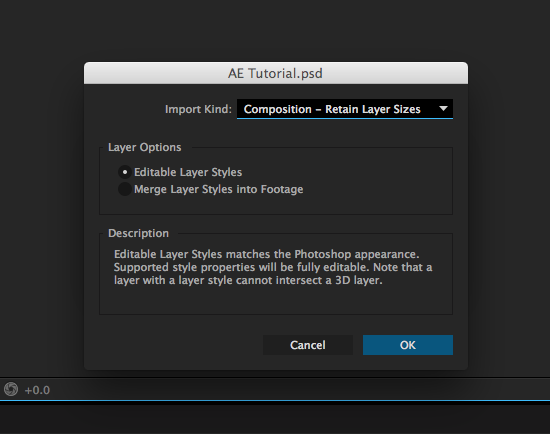
Check Editable Layer Styles, press OK.
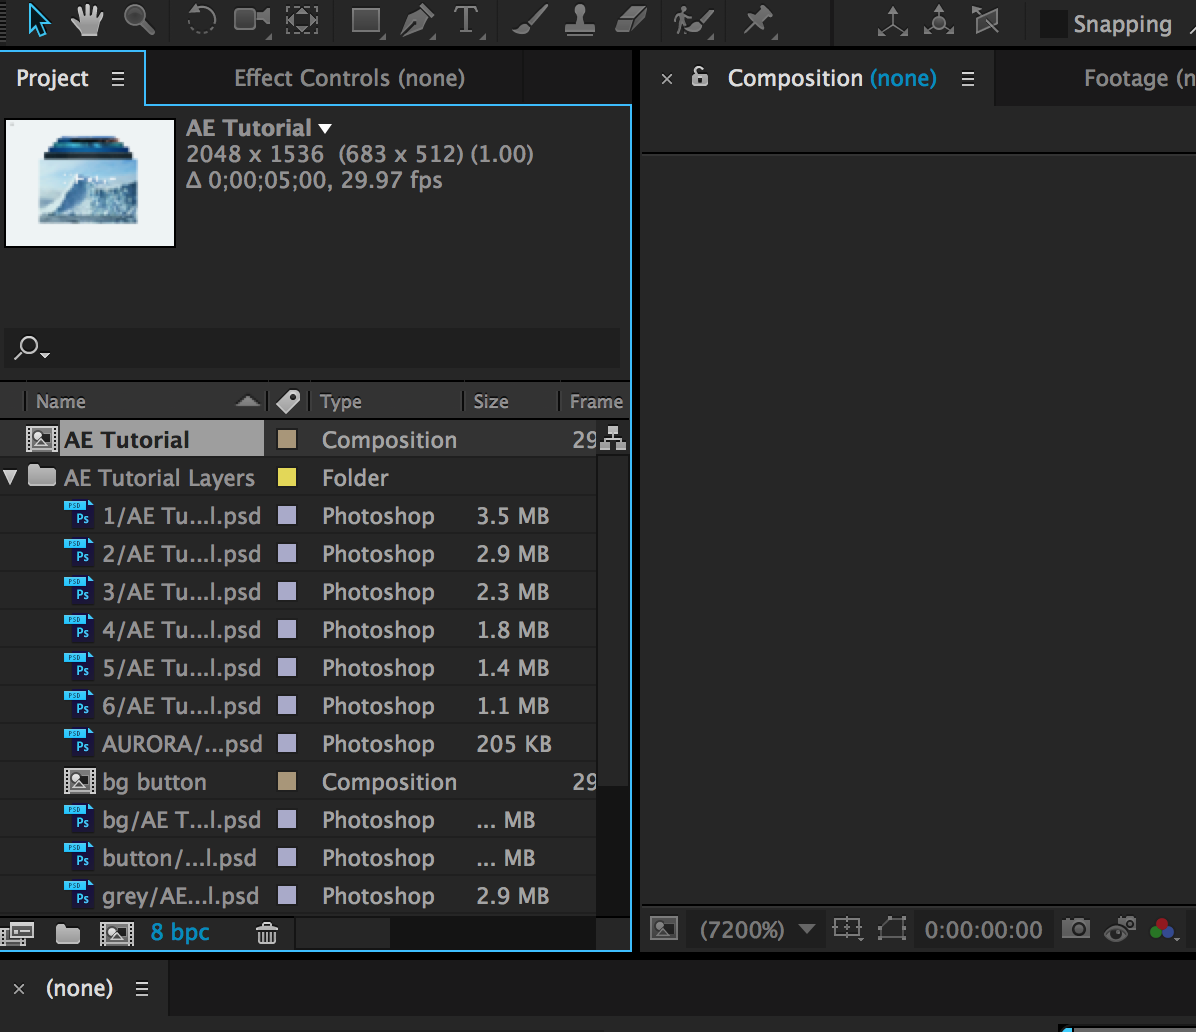
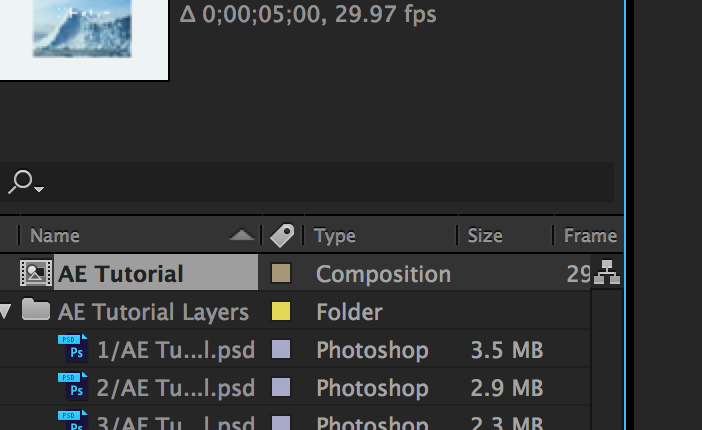
Finally, your layered PSD is correctly imported. All the layers in Photoshop are marked as Photoshop assets and the groups are Composition assets in Project Panel.
Composition
Composition in AE is similar to Group in Photoshop, you can edit each layer in Composition or you can use the composition as a whole to animate it.
As we imported photoshop file instead of JPEGs, AE already creates a composition for us. Double click AE Tutorial Composition in Project Panel.
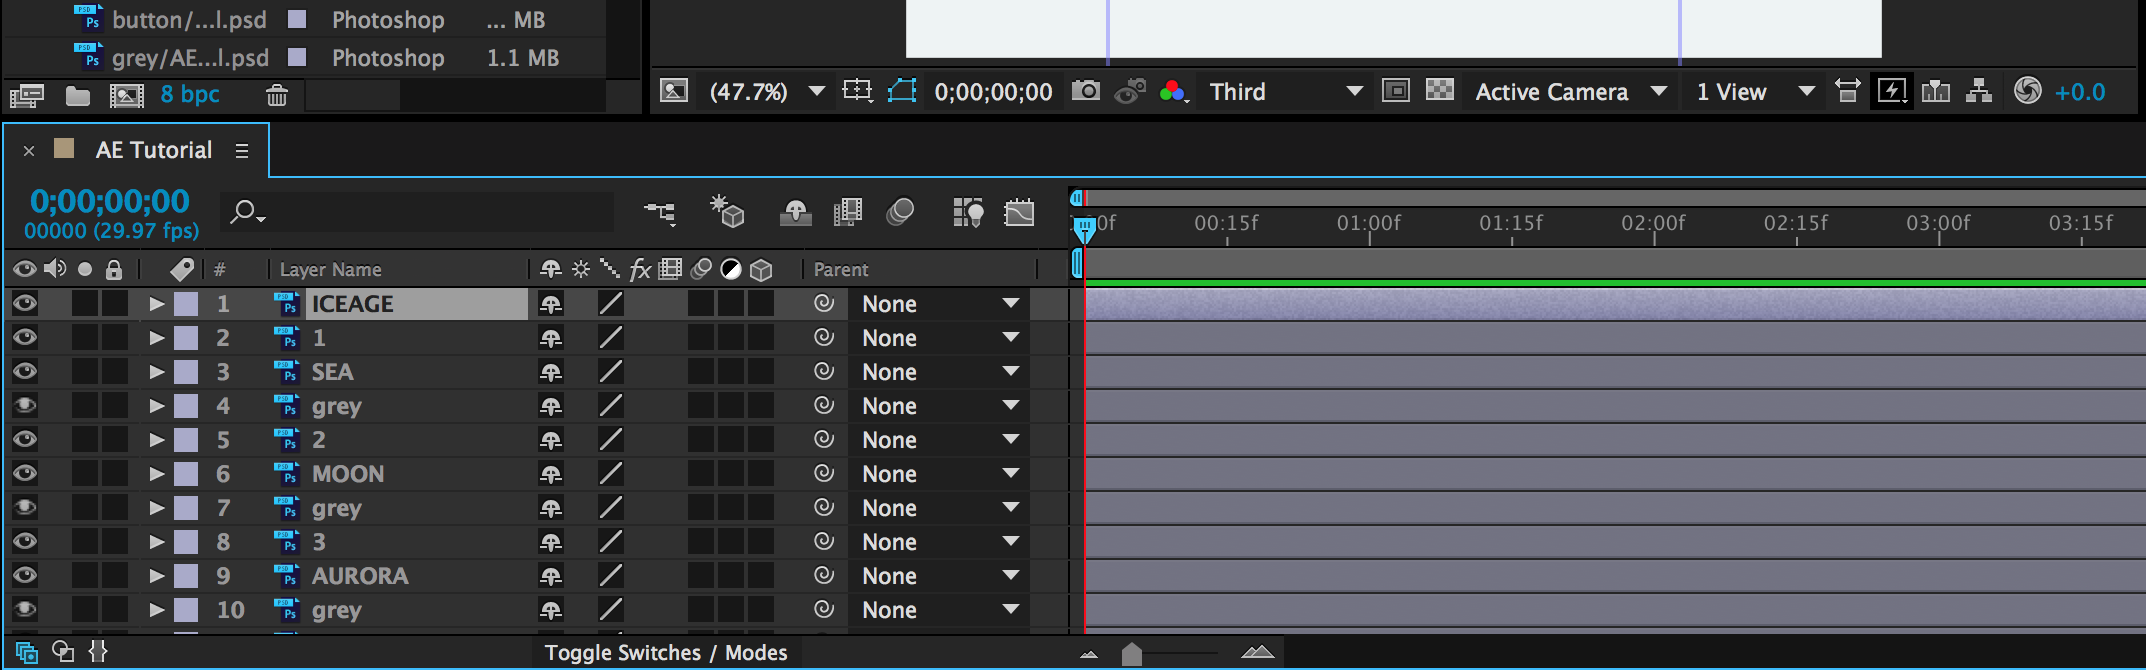
You can see AE Tutorial composition is opened in timeline, all the layers in Photoshop are listed here.
Press Command + k on your keyboard to open Composition Settings. You can change the name and size of this composition, for now, let's just change the Duration to be 3s.

Set Keyframe
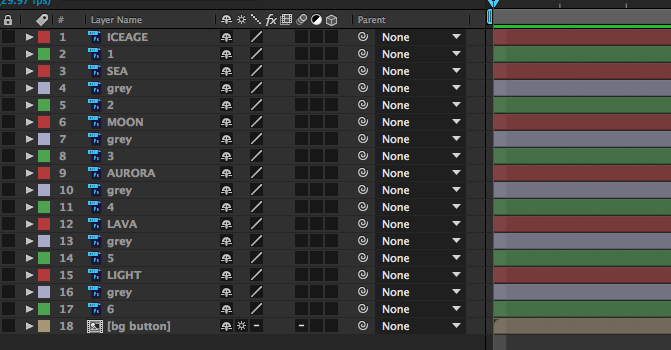
Before jumping into keyframe, let's organize our layers first.
Select all the text layers, click the Purple Square, change the text layer color to Red.

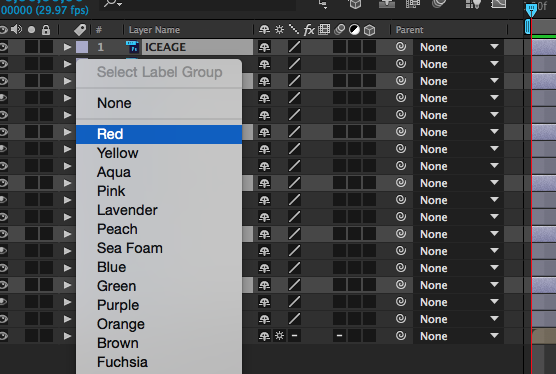
Repeat the same step to set layers as below. So Red is text layer, green is image layer and purple is grey overlay layer. This will make the animation process much faster.
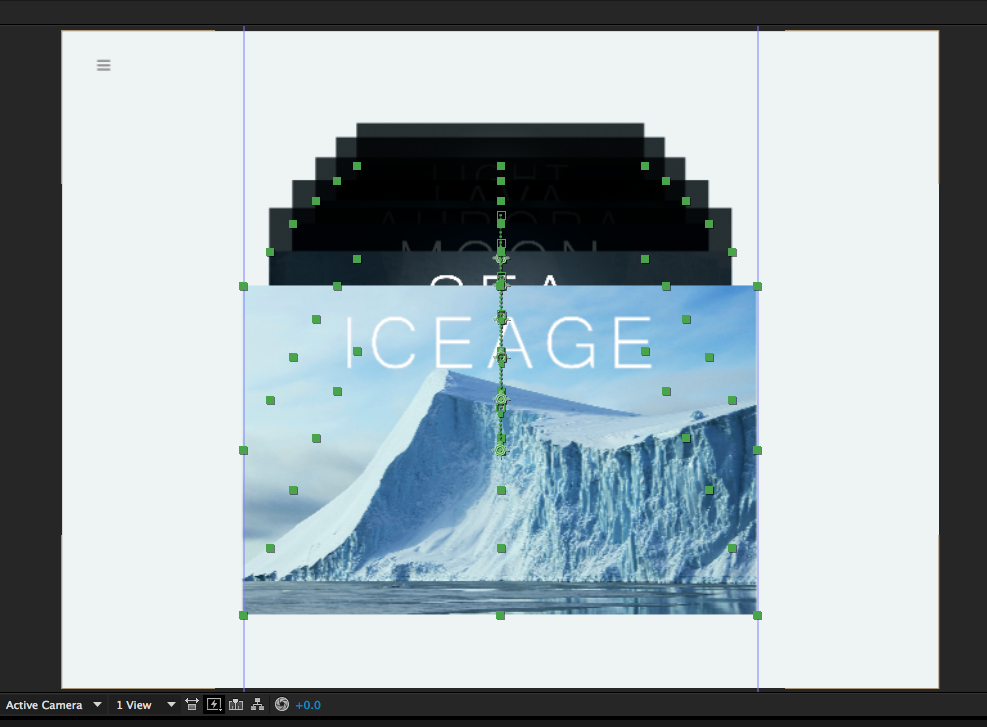
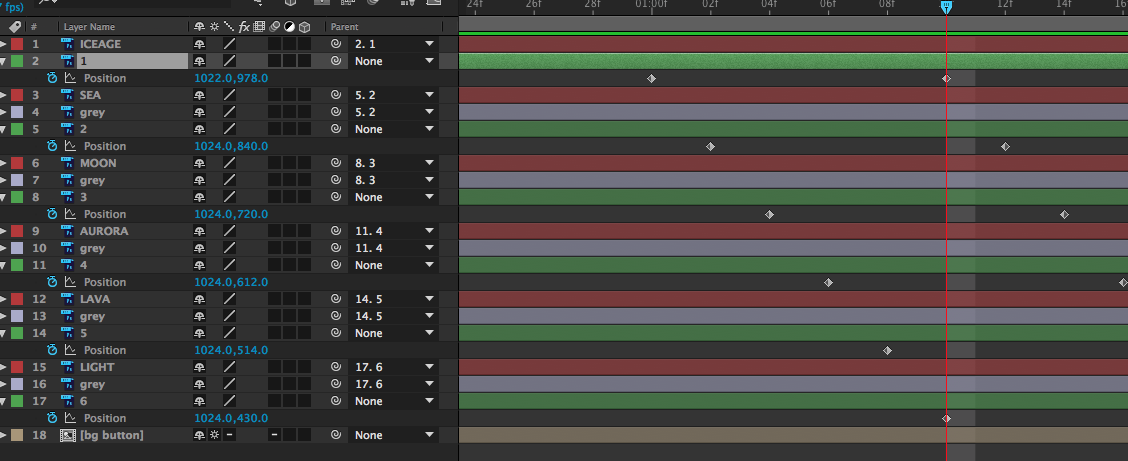
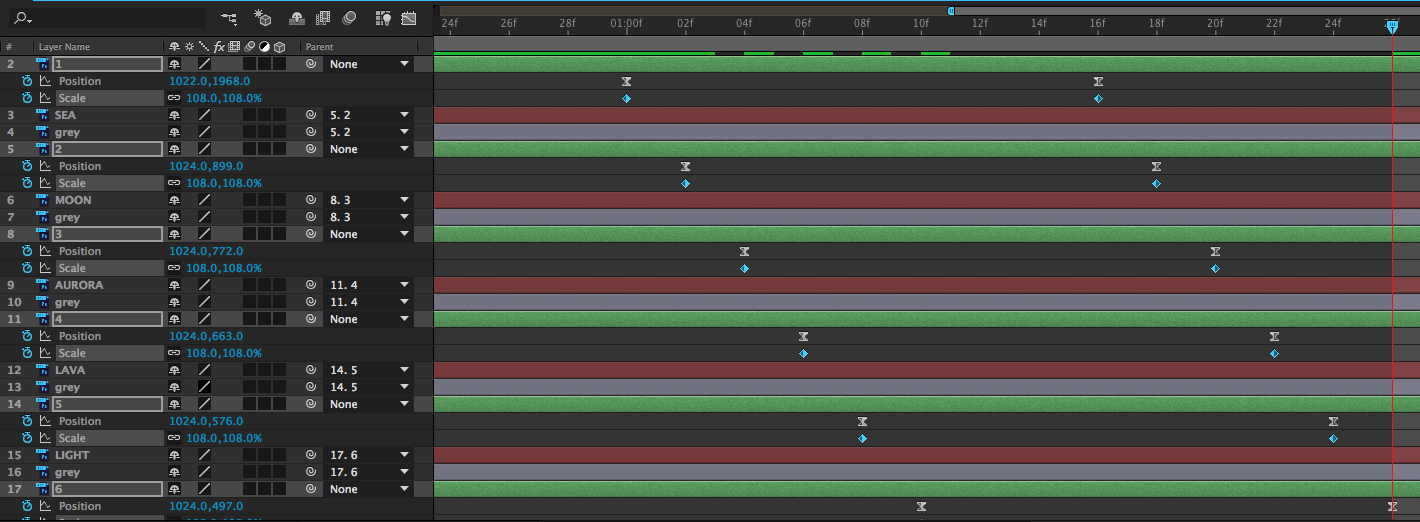
Select all green layers, hit p on keyboard to open Position attribute
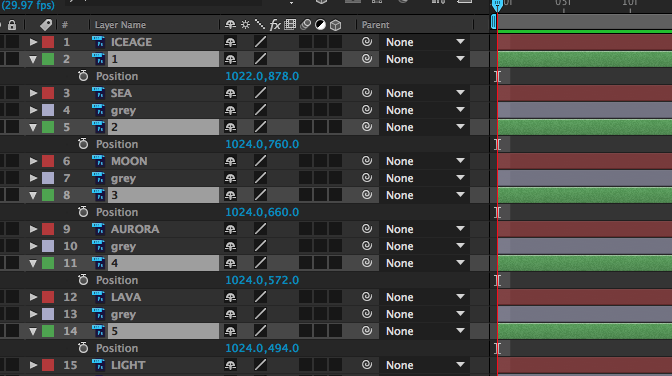
Move Time Indicator to 01:00f (1s), and then click the Clock button before Position.

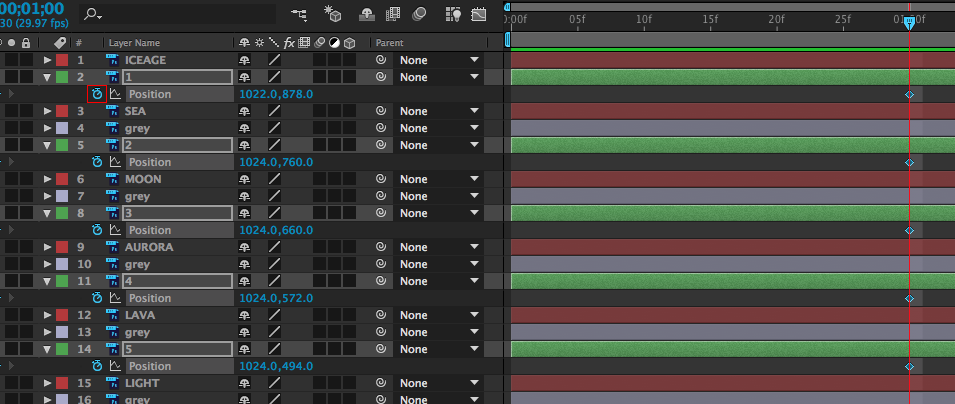
Press Shift + Command + Right Arrow to forward indicator 10 frames. Click the Diamond button to set a second keyframe.
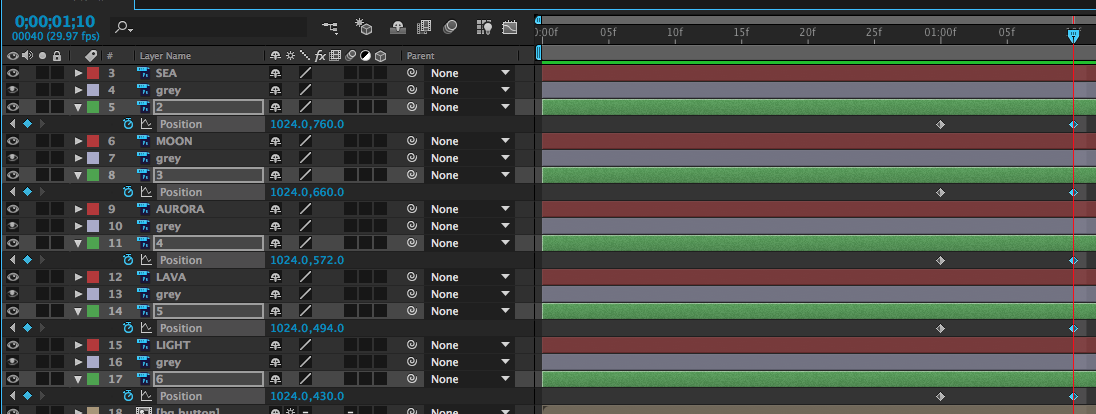
With all Green layers selected, press Shift + Page Down as many times as you want to move all the images down.
Parent Layers
Now we need to let all Texts and overlay layers move along with images, there is a very easy way to do that.
Firstly, press j on the keyboard to go back to previous frame where all texts and overlay layers are at the right position.
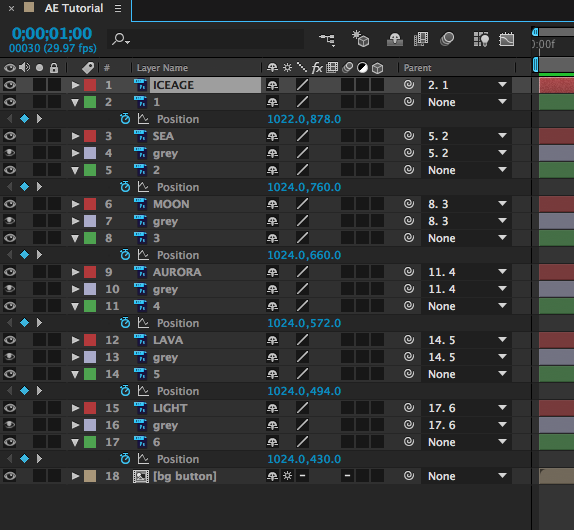
Choose ICEAGE layer, drag the Spiral button under Parent and link it to Green 1 layer.

Repeat the same step for all Red text layers: link SEA to 2, MOON to 3, AURORA to 4, LAVA to 5 and LIGHT to 6. So all the text layers become children of image layers, will copy image layers' position attribute and move with them.
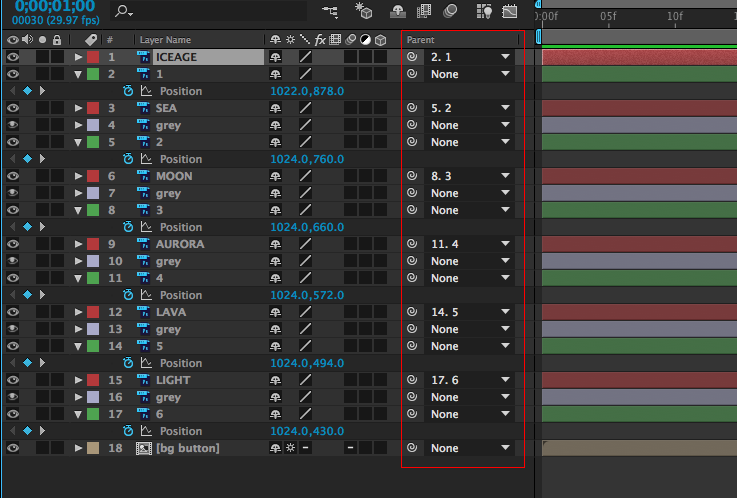
Then Parent all the Purple grey overlay layers to image layers.
Preview
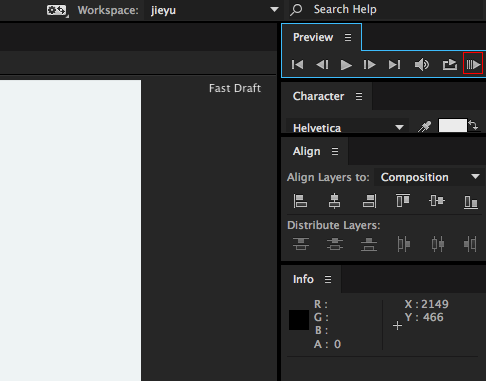
It's better to preview the animation before moving forward.
Click the Ram Preview button or press Control + 0 to render and play the result in real time.
Adjust Position
Let's make this animation looks more natural.
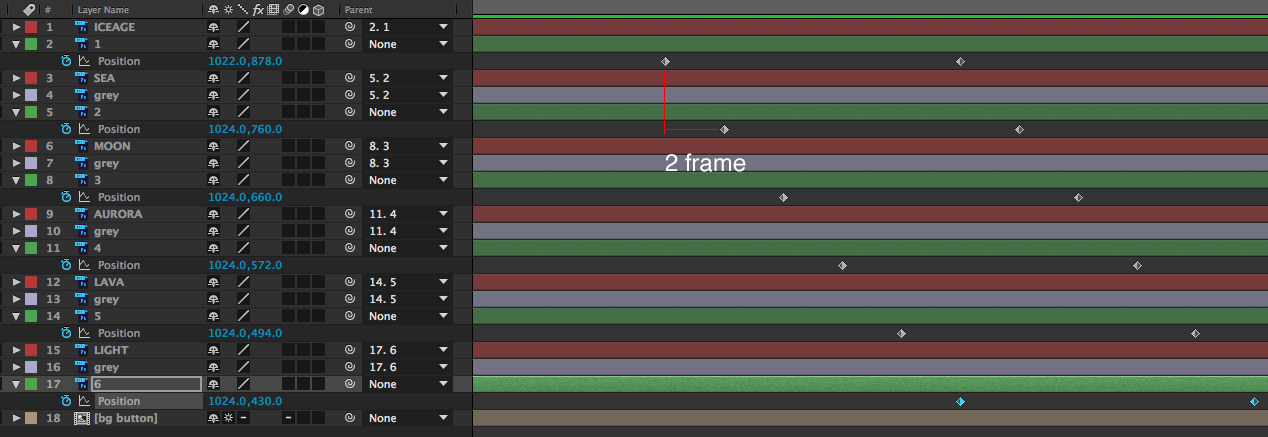
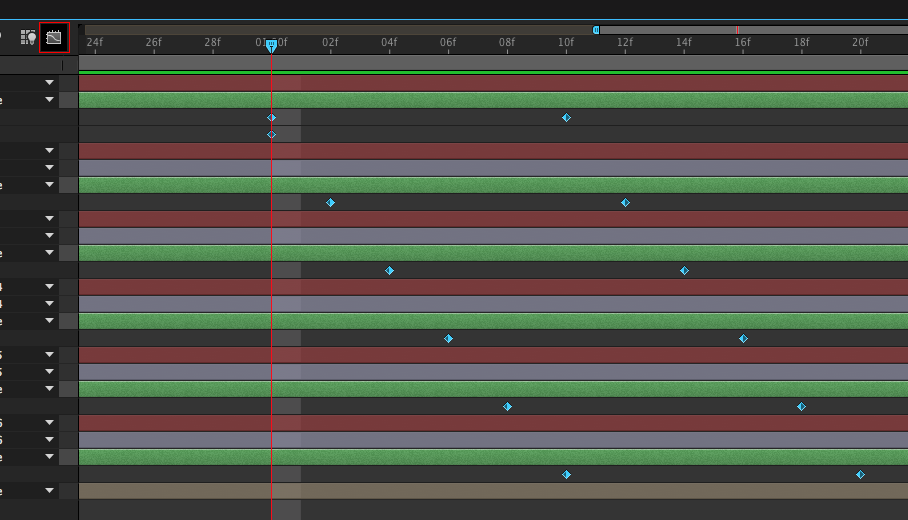
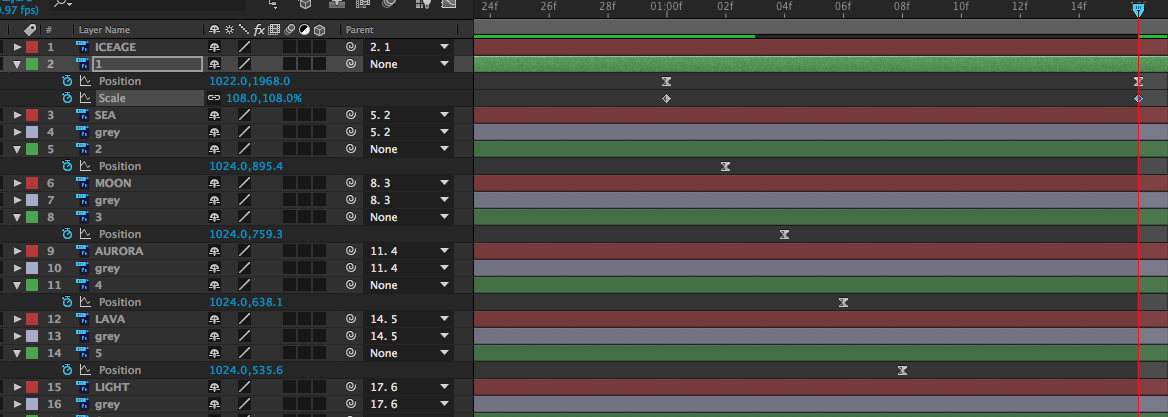
Firstly, create some delay time for all layers except the first one. So the next card will move after the previous one moves.
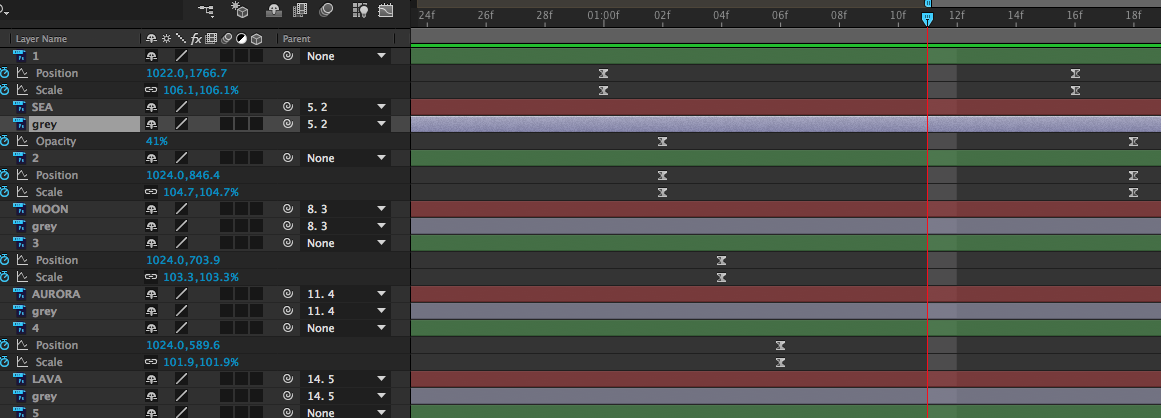
Drag and move keyframes to look like this. The next layer's keyframes are 2 frames behind the previous layers'.
Then let's adjust each layers' final positions. We'll make the first card move off the screen, and next cards become bigger.
Select Green 1 layer, move the indicator to the second keyframe, press Shift + Page Down to move the first card off the screen.
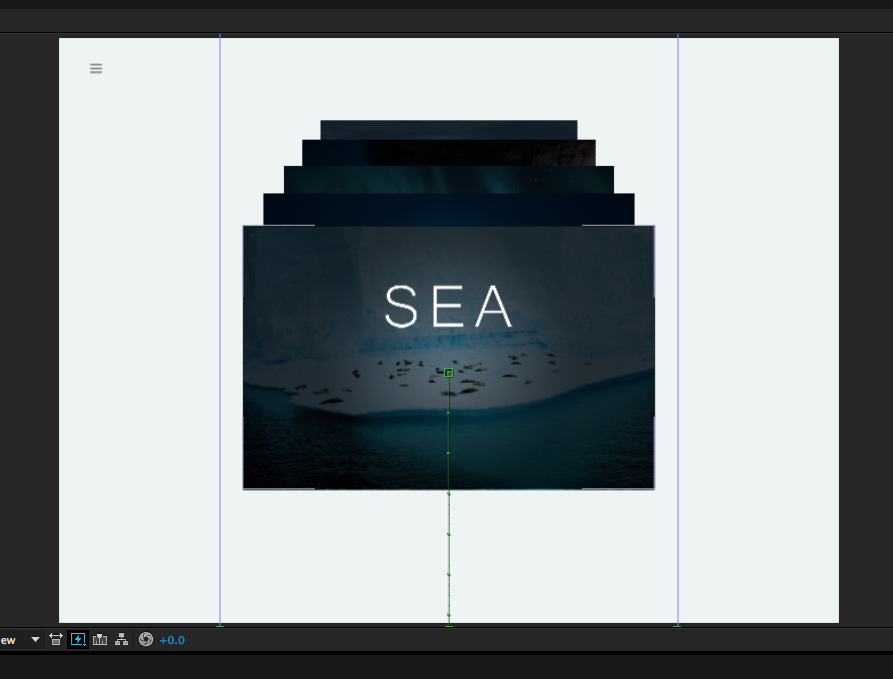
Similarly, we can adjust other Green image layers using the same way, to make their final position natural and consistent.
In order to make the transition more fluent, we need to edit Speed Curve.
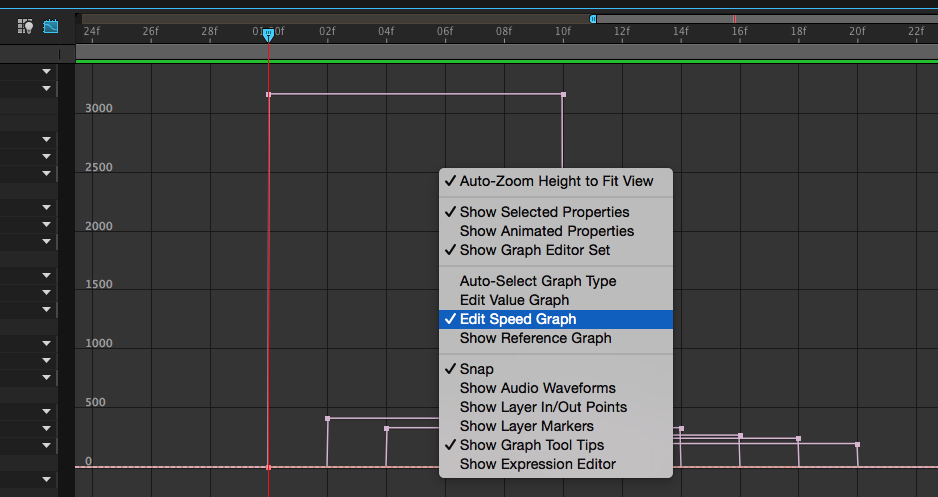
Select all the keyframes, click the Graph Editor.
You can see the Graph Editor pen like this, right click to make sure Edit Speed Graph is checked.
Select all the points, click Easy Ease button
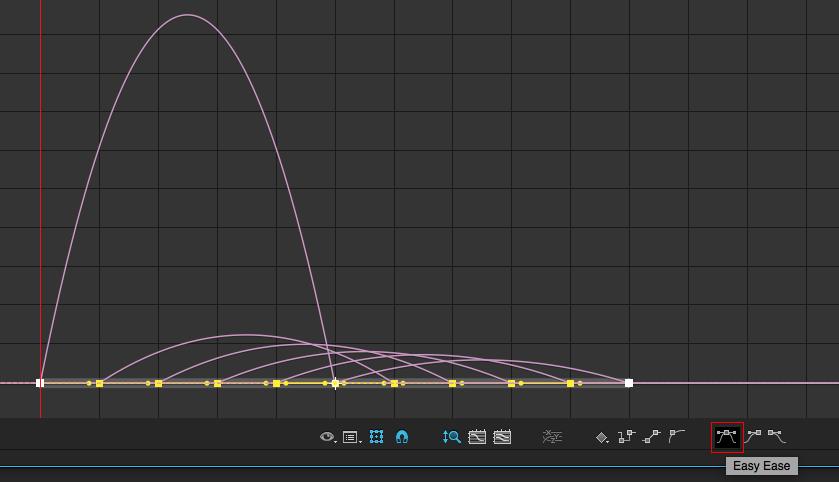
To make it more dynamic, we can edit the curve by dragging its yellow handle to make it look like below. So layers will hold on a little bit, then drop quickly and finally stop slowly.
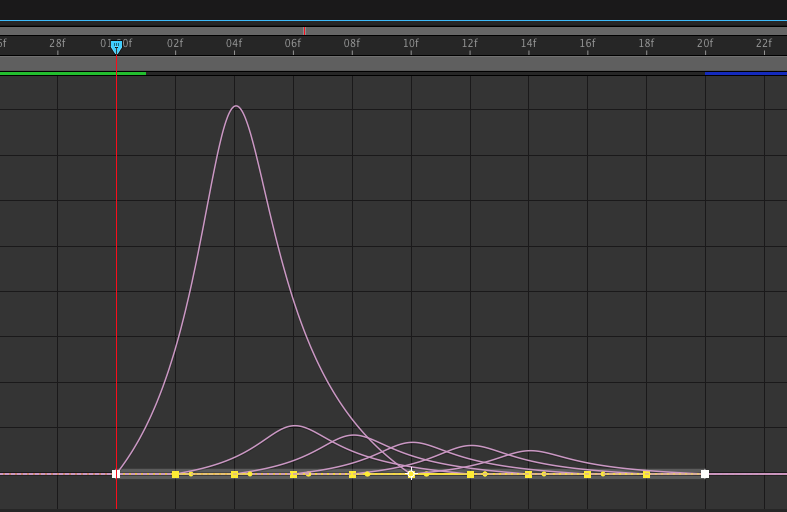
If the movement is too fast, we can forward all second keyframes 10 frames.
Adjust Size & Opacity
Then, we can also add some size changes to each card, so when each card moving forward, it's getting bigger.
Go back to Green 1 layer, move indicator to the first keyframe, press Shift + s to open Scale attribute. Click the Clock button to set the first keyframe. Then set the second keyframe and change its value to be 108% as below.
Repeat the same steps for left Green layers. Then select all Scale Attributes, click Graph Editor and adjust the curves to be Easy Ease for now.
Another adjustment is to make the second card brighter (decrease the opacity of its overlay layer) when it scrolls to the front.
Find the first Purple grey layer, press t to open Opacity attribute, set two keyframes and change the second value to be 0%. At last, make two keyframes Easy Ease like we did for sizes.
Bonus - 3D Effect!
Now we have a pretty decent look for a scrolling animation, let's also add some cool 3D effect to it.
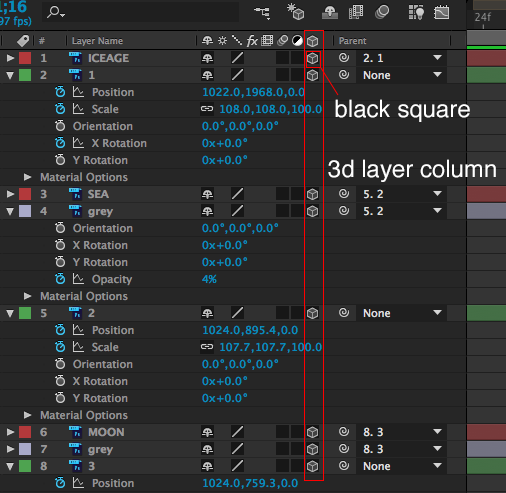
Choose all the layers except background layer, click the black square under 3D Layer column.
Only select the first Green layer, set two X Rotation keyframes as below.
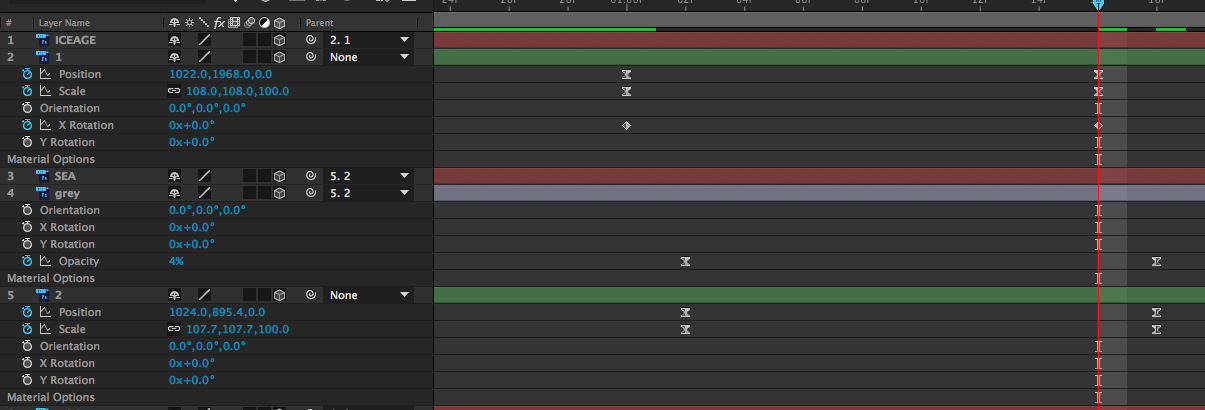
Move to the 1/3 place between two keyframes, create the third one and change its value to be 0x+10.0. And then make all three keyframes Easy Ease. Repeat the same step for other green layers.

When you preview it by hitting Control + 0, you may notice some back layers will come across front layers. That's because all layers are on the same Z axis. We need to move layers on the back a little bit further into the screen.
Let's go to Green 5 layer, move the indicator to the first Position keyframe, change it's third value to be -2, then move the indicator to the second Position keyframe, also change the third value to be -2.
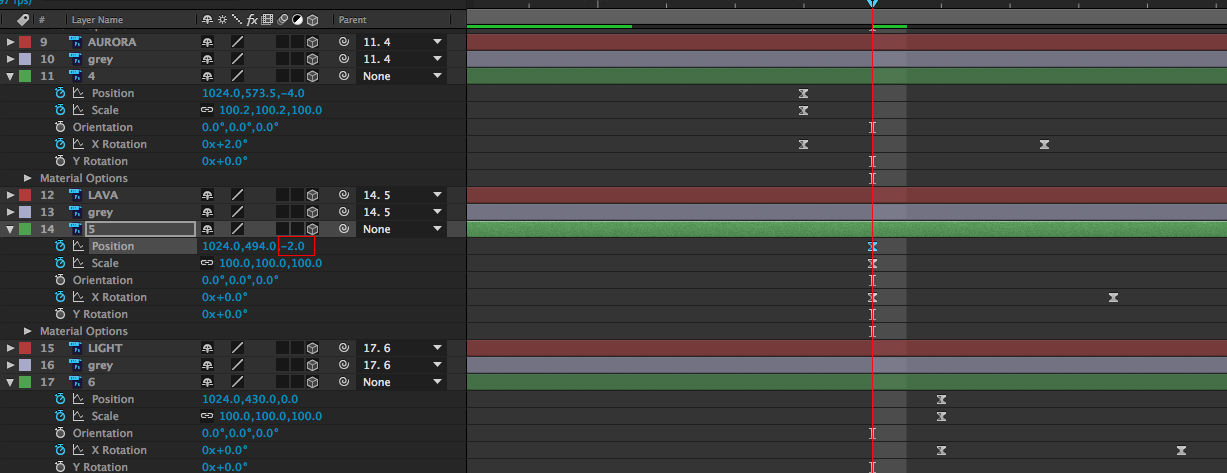
Repeat the same step for other green layers, but the value for each layer should be -4, -6, -8, -10.
Export
It's time to export our scrolling animation!
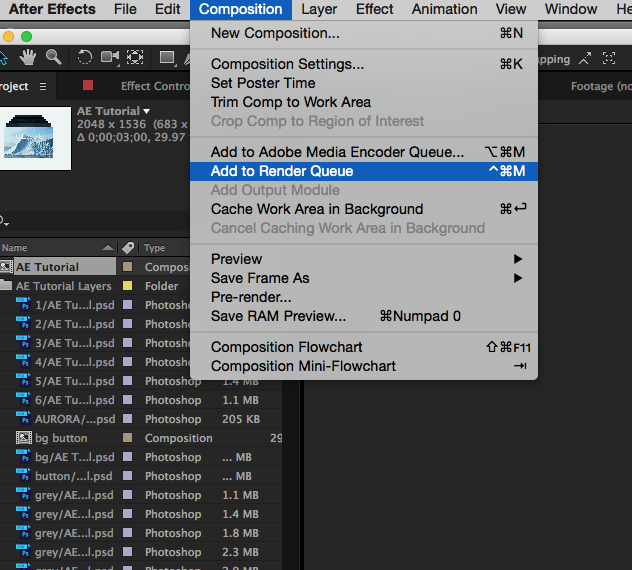
Select all layers, go to Composition - Add to Render Queen or press Control + Command + m to open Render Queue window.
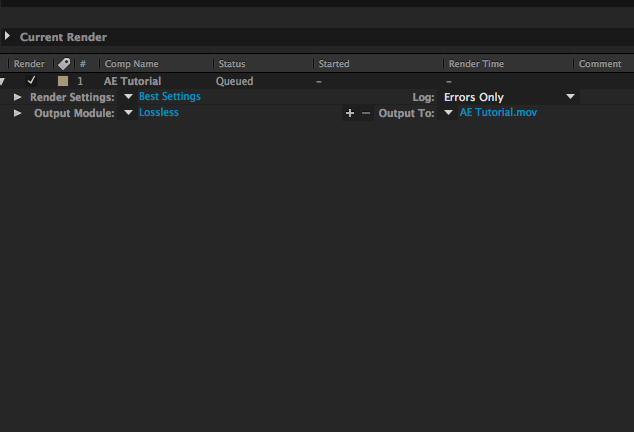
In Render Queue window, click Output Module: Lossless.
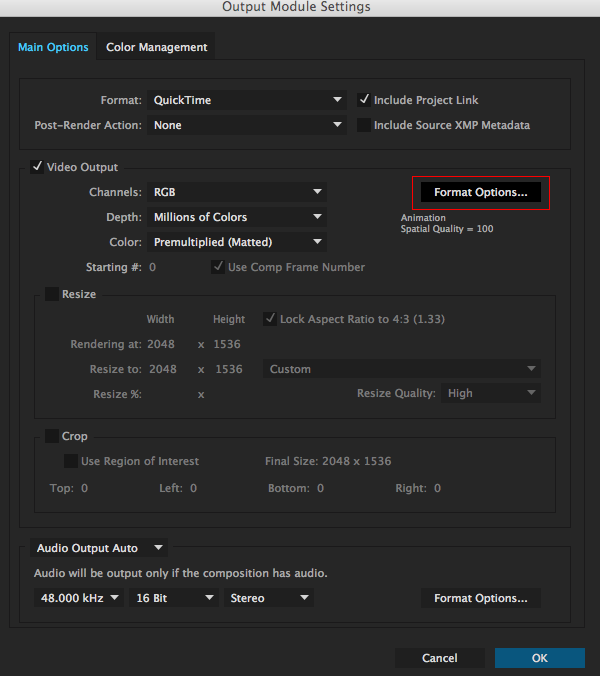
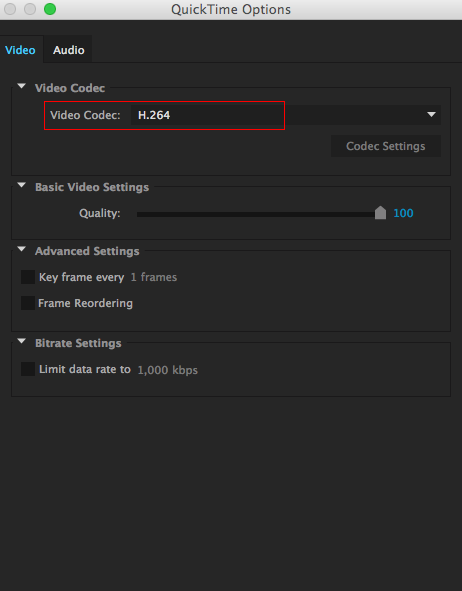
In Output Module Settings, click Format Options, change Video Codec to be H.264.
Then back to Render Queue window, click Output To: AE Tutorial.mov to change the name of video and the place where you wanna save it.
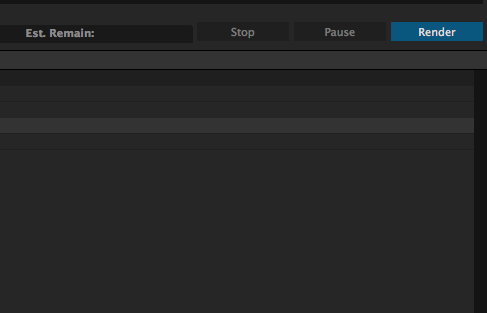
Finally, let's click Render button to get your video rendered and saved!
Sample Video
- Use After Effect for UI Deisgn
- Creating an App Walkthrough
- UI/UX Motion Study
- UI Design Presentation
- iOS7 UI Effects
- Special Effects
- Video Copilot
- Digital Tutors
- Tutsplus - After Effects